 Welcome back to The Dungeon. This tutorial is so big, it will be split into 2 sections. In this first written tutorial, we will go over on how to use Unwrap UVW and unwrap the Crate.
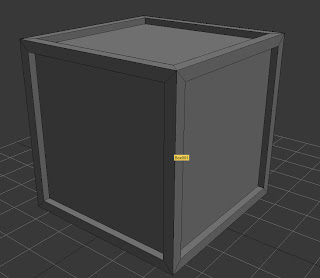
So let us get started. Either open the crate file that we did before or create a crate like this below. I'll wait...
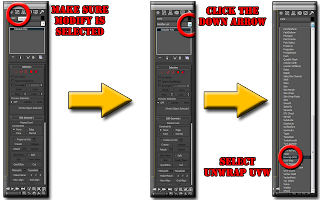
 Make sure your crate is selected. Go to the right side and make sure you have the modify tab selected. Then next to the Modify List, click on the the down arrow. A list of "modifiers" will appear. Scroll down all the way to the bottom and select Unwrap UVW.
  Now your box should have green outlines and Unwrap UVW above your Edible Poly under the modifier list. Keeping up so far? Good, moving on. The green lines show you where your seems will be when you "flatten" your model out. We will need to fix this so it looks as if it is a unfolded box. You'll see what I mean.
 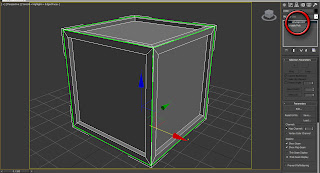 With the crate selected, on the right select the "Edit" button under Parameters. This will bring up another window.
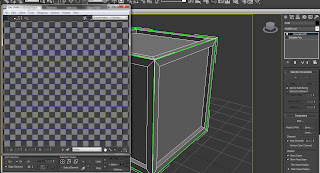 In this new window, Edit UVW's, select the Face Sub-Object Mode
  Now some of the faces will be already selected, showing in red.
 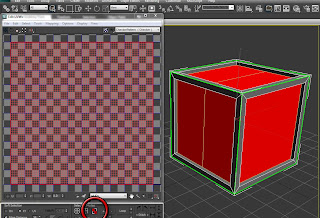 Now before you click on anything else, at the top of this window select the Scale tool
  We are going to scale the selected faces one square. Then at the bottom, click on the + button. This will selected the other faces that are touching the selected faces you have already selected. Make sense? Good, moving on. Then like before, scale it down again one square.
 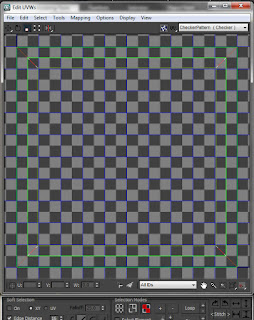 To help see the lines, in the menu bar in the same window go to Show then down to Edge Distortion. This will change the outlines colors. With the top selected, use the move tool and move it up while holding the Shift key. The Shift Key keeps it straight. Make sure you have enough space for other faces.
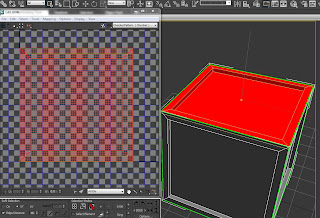
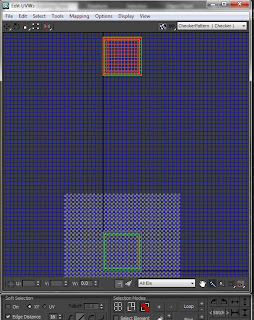 Do this to all the sides, make it like you unfolded a box. A example is below.
 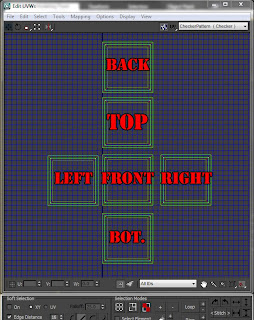 Once all that is down, we need to check all the edges for future reference. To help us see a little better, lets turn off a few things. To turn the grid on and off go to View, then click on Show Grid. We want Show Grid unchecked at the moment. Then we need to turn the Edge Distortion back off for this part. When you select one of the faces that is close to the edge, the edge of the face that is next to it should turn blue. That means that face is connected to that face. Make sense? Good, moving on. Look below to see what I mean.
 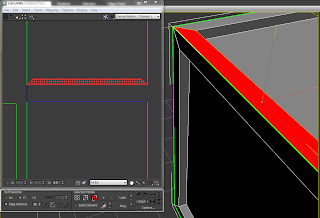 Now when you do this for the back, it should not line up. If you followed my steps, IT SHOULD NOT LINE UP! If it does then it is a miracle. It should be the same with the bottom side also.
 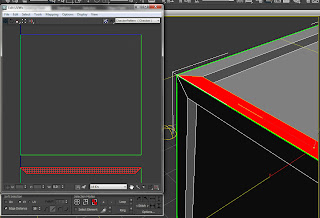 To fix this issue, make sure the whole back is selected. Then go up and click the Rotate tool
  Rotate the back 180 degrees, and make sure the lines are as straight as George Michael... Maybe straighter then that. Check it so that is looks like the below picture. Do the same for the bottom side, or any others that don't line up.
 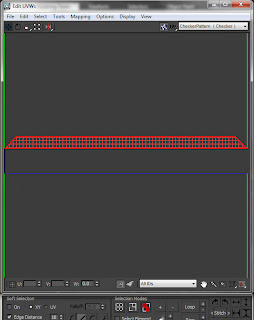 Now that all the sides are lined up and are faces the correct direction, we get to fuse them together. But we need to move these sides a lot closer to each other so that the edges are over lapping each other.
 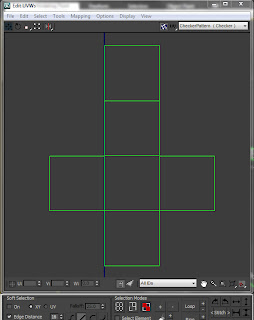 Now press CTRL + A, or click and drag over all the faces to select them all. Using the move tool, move them down to the blue square. Will everything is selected, scale it down do is fits inside this blue square. We want to keep the faces inside the blue square, if it goes out, you will not be able to texture it.
 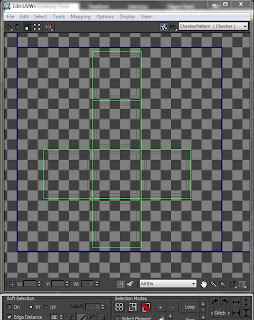 Now we need to wield the overlapping vertices together. To do this, make sure the Vertex Sub-Object Mode button is selected at the bottom
  . To select the over lapping edges we will click and drag over the over lapping edges to select them. Make sense? Good, moving on. Then you can press CTRL + W or you can go up to Tools, then down to Wield Selected. Below is the picture of what ones we need to wield.
 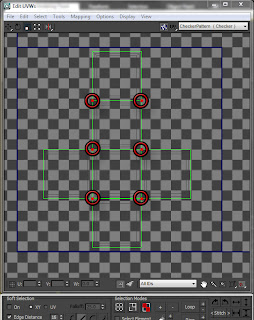 After those are weld, you might notice that the over lapping green lines have vanished. This is a good thing. It means the two have became one, mazel tov!
 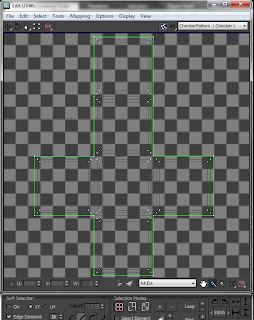 No we made our unwrap... Not, we still need to export it so we can paint on it. So go up to Tools, down to Render UVW Template. Another window will appear. Here are where you can change the size of the texture and other pointless stuff. For the Height and the Width we can keep it at 1024. Now if you were doing a project your art director should tell you the size. If not, think of it like this: Smaller the the device, smaller the texture. Bigger the project, bigger the texture. But for this tutorial I am just going to keep it at 1024. Then just click the Render Button at the bottom of the new window.
 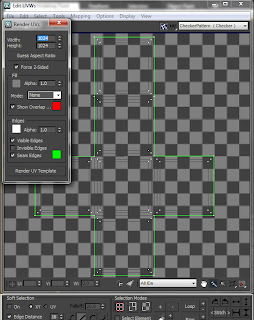 Then another window will appear! Don't worry this is not what it will look exactly. Just click the floppy disk at the top of this new window to save it
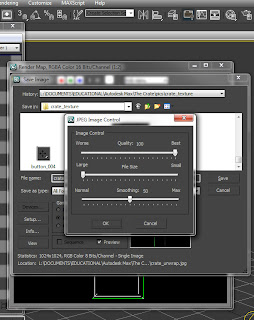
  . Pick a spot to save it, and make sure you save it as a JPEG.
 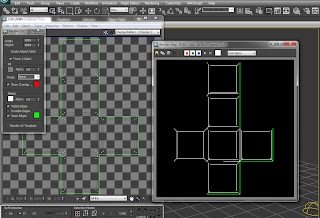 Then guess what... Another window will appear! Just ignore this window, unless you want to mess around with the settings. But ignore it and press OK.
  Now you are done with this section. Your file that you saved should look something like this:
 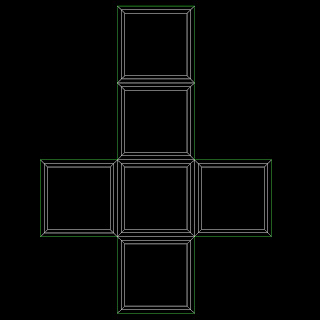 So in this tutorial we went over: How to add the Unwrap UVW Modifier Editing the UVW Select, move, rotate, and scale faces and vertices of the UVW Wielding vertices together And exporting the UVW out to a JPEG In the next part we will go over on making a texture in Photoshop and placing it on the model.
Please comment, reply, love or hate it, so I can make better tutorials to help those who need it. Stay tune for the next part. Later!
Short cuts to remember:
CTRL + Z = Undo
CTRL + W = Wield Selected
CTRL + A = Select All
CTRL + S = Save!!!

No comments:
Post a Comment